Wednesday, September 30, 2009
Bridge
Design a pedestrian bridge using the Terrain.3dm rhino file as your work space. The ravine that the bridge must span is approximately 60' wide, by 40' deep. The bridge should connect the two platforms on either side of the ravine. Be mindful that the bridge will have to accommodate for the difference in elevation between the two platforms. For this project there are three key components. One, design a walkway that precisely accomplishes its intended function. Link the platforms in a manner that would be safe, comfortable, and enjoyable. Try not to resort to steep inclines or harsh turns. Two, model a structural system that could support your walkway. Be creative and thoughtful, considering thicknesses and lengths of your structural components. Three, build an overhead trellis for shading the walkway, allowing yourself some freedom in its interaction and connection points with the walkway and platforms.
Tuesday, September 29, 2009
Ian Downing: ET Algorithm 01
 Description of Work
The images above are the result of the in class exercise in which each student created a series of rules ("sudocode") in order to attempt to create something of interest. In this particular set of rules, the participants utilized their own birthday (month/day) in order to influence and effect the outcome of the drawing. As a result, the final drawing became a representation of the class as a whole. In the large image above, the top represents the month in which each student was born (from January on the right, to December on the left), while the bottom represented the day (from the 1st on the right, to the 31st on the left). The connections between the two sides create intersections which were highlighted, giving visual interest to the piece.
Rules
1. Using the straightedge, draw a line (in pencil) connecting the month and day, which corresponds to your birthday. (First line drawn represents January 26th)
- The left side divisions correspond to the month (Top January-December Bottom).
- The right side divisions correspond to the day (Top 1-31 Bottom).
2. Where your line intersects another one, trace the nickel (in black pen) to draw a circle around each intersection.
3. If the nickel seems to be missing, use the red pen to draw a dot at the intersections.
4. Using the straightedge, draw one red line of any length passing through two circled intersections.
Monday, September 28, 2009
Alex Dupnik: ET Algorithm 01

Read directions one by one following each rule as you go.
1. Choose one piece of string; tie end to any nail.
2. Choose a nail non-adjacent to current wrapped nail.
*(non-adjacent= nail must be greater than or equal to 2 nails away in all directions from current wrapped nail).
3. Keeping the string taut, wrap a point on the string once around any height on the chosen nail.
4. Repeat steps (2-3) choosing a new nail and a new height, wrapping until approximately one-inch remains on string.
*(new nail/height= any nail/height that is different from the previous nail/height)
5. Tie one-inch end of string off around final nail.
6. Repeat steps 1-5 if time remains with new string.
Friday, September 25, 2009
Tuesday, September 22, 2009
Chair
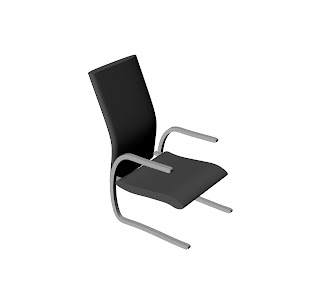
In session 01 you began to navigate within Rhino's interface and perform some of the key geometric operations for 3d modeling. For this assignment experiment with the tools that were demonstrated in class, and allow yourself to explore others. While you are modeling, make a conscious effort to try multiple methods for achieving a desired goal. Typically you'll discover that all methods are not equally useful/efficient for a given task, although they may eventually arrive at the same destination. Model a chair, from reality, that you find peculiar or compelling. Try to articulate its lines, curves, surfaces and materials as closely as possible. Be mindful of fundamental principles of scale, proportion, interior vs. exterior, and solid vs. void. (hint: a polysurface is a group of two or more surfaces that have been “join”ed together)
Stair
Design a stair using the Room.3dm rhino file as your work space. The stair will connect the lower level to the upper level (10'-6” vertically), and should include handrails, risers (7”), treads (10”), and some structure to support the stair. The stair can be spiral, straight, or turned, but in all cases should be 3'-0” wide, including a landing that is 4' long. Place the stair anywhere you like within the confines of the contextual geometry you've been given.


Bench
Using the Pentagon Memorial benches as a springboard for exploring the use of surface continuity in design, consider how an architectural surface might peel into a piece of furniture. First, build a wall (10’ x 10’ x 5”) on a flat slab (10’ x 10’ x 5”). Think of this initial construction as your canvas. Next, design a bench that peels away from the wall. The orientation, scale, and form of the bench is entirely up to you, though it should have enough flat surface area to accommodate 3 (average size) people sitting next to one another. Feel free to explore seemingly absurd cantilevers and/or strange twists. However, part of the bench should make contact with the slab in an effort to demonstrate how it could be supported. Use this assignment to showcase both your understanding of surface generation techniques, and your capacity to operate on surfaces and modify them based on your particular design sensibilities.
ET ALgorithm 01
Design an algorithm that will be used to produce a sketch by everyone in the class but you. Your canvas is 24x36 inches. Each of your artist colleagues will have 4 minutes to execute your instructions.
Intro
This site will serve as an open forum for observing, sharing, and discussing the work of WIT architecture students [grads and undergrads] as part of the Design Computing and Digital Fabrication course > fall 2009.
Subscribe to:
Comments (Atom)


